Tuesday, May 24, 2011

Blueberry Rhubarb Deep Dish Pie


Someone please tell me what day and hour it is because I honestly don't know.  Last week was sort of this whirlwind of get-on-a-plane, get-off-a-plane, give-a-talk, get-back-on-a-plane, get-back-off-a-plane, meet-new-people, get-back-on-a-plane... and rinse and repeat and so on and so forth.  Hence, I have no idea what day it actually is right now!  One moment I was in Scotland, then the next in Manchester (UK), and then in Atlanta (Georgia), and then back in California, and my head is still spinning from it all, and I can't really stomach the thought of another long plane ride, like, ever again.  Or at the very least, for a few months, please I just want to stay in one place and time zone, thankyouverymuch.


Not to say that the trip wasn't incredibly fun.  I love getting away from my daily life every now and then, and even though this was a work-related trip, it still felt like a much-needed vacation.  Shaking up your 'normal' routine is so helpful every now and then, and seeing new places and meeting new people is refreshing after endless daysweeksmonths of the office-home-office routine.

The trip wasn't all work-related though.  I managed to make it to BlogHer Food in Atlanta on my way back from Europe to the West Coast (you know, cause it's, like, totally on the way), and it was so wonderful to meet so many of you in person and to see those of you I've met before again!  The best part of these conferences is being able to put faces to names/avatars, and I always enjoy that.  It just makes the whole blogging community much more human and tangible.  At BlogHer Food, Tami, Aran, and I gave a panel on "Finding your visual voice," during which I myself learned so much from listening to Tami and Aran speak--I just wish it could have gone on much longer because there were so many things to learn and so many great questions to discuss!  For those of you who couldn't make it to BlogHer Food, I believe the audio recording of our presentation should make its way onto the conference website sometime soon, and I'll make sure to let you know when it does.


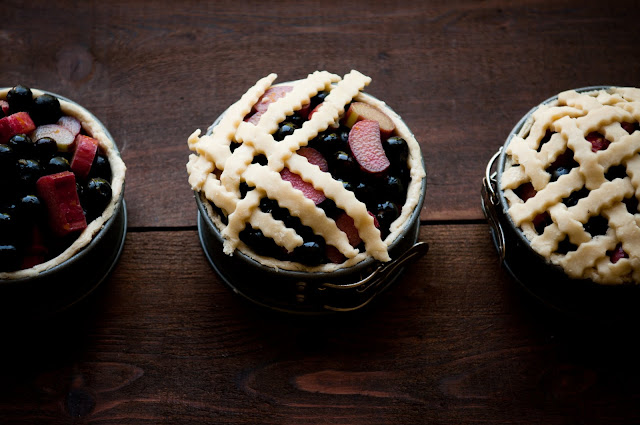
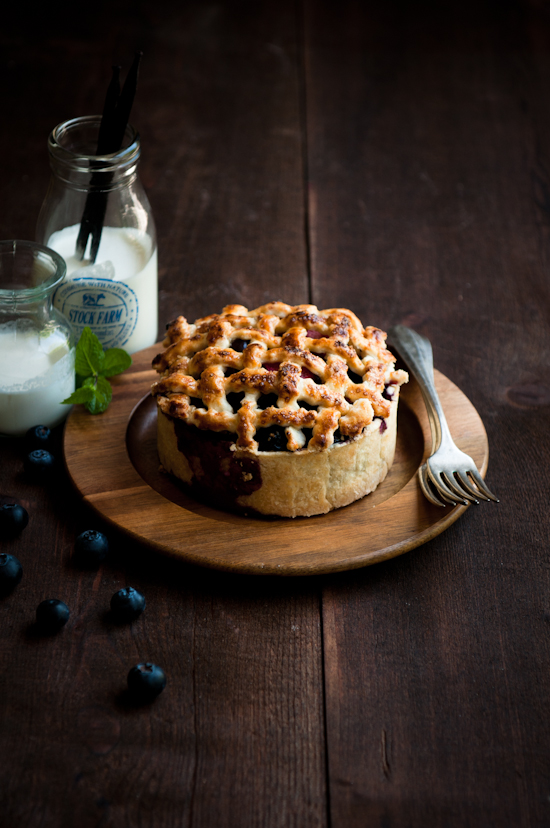
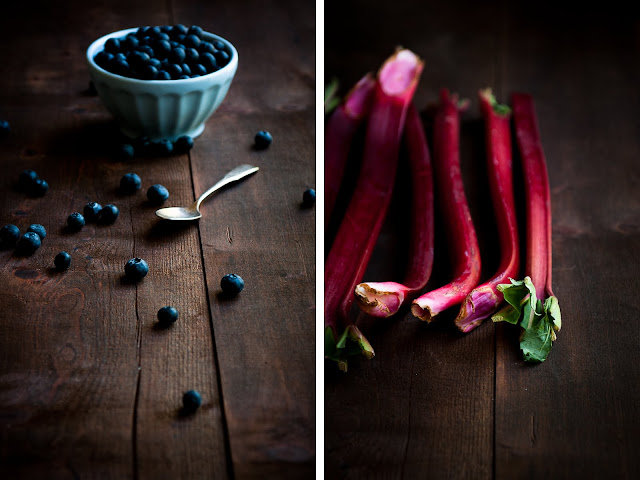
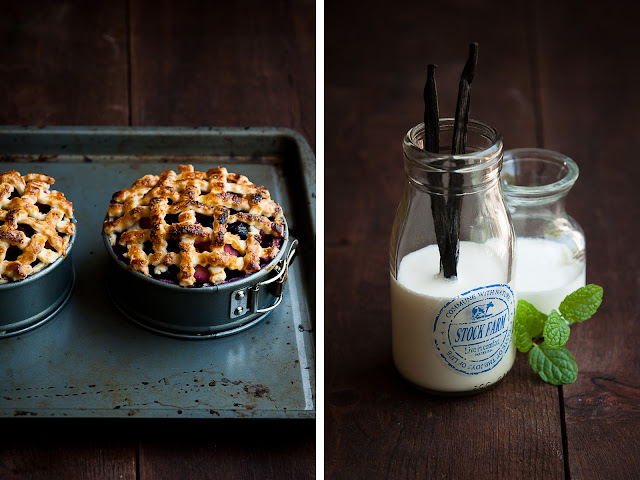
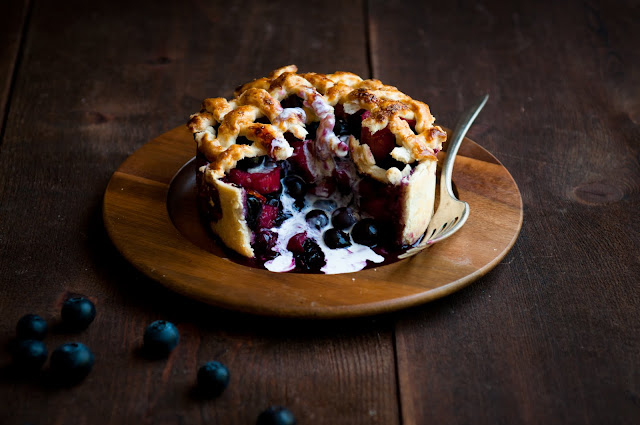
I'll post more about my trip in the coming week after I sort through my thoughts and photos much more thoroughly--and after my body finally figures out what time zone it wants to be in again!  In the meantime, I came home wanting a simple and down-to-earth dessert, something hearty and uncomplicated to ease myself back into the swing of things (and something to accompany the long hours of wading through my email back-log that's built up over the past week or so).  Pie, for some reason, always fits the bill of the "homey classic."  For the past few weeks, I've been seeing the combination of blueberry and rhubarb together, so I put together this blueberry and rhubarb deep dish pie, with a healthy hint of orange zest and a generous splash of heavy cream. ... and deep dish because you can never get enough fruit into pies.  After eating this one--sweet, straightforward, bursting with blueberry flavor and a dash of rhubarb tartness, I have to say that I'm liking the blueberry+rhubarb (aka: "bluebarbberry") combination much better than the classic strawberry+rhubarb!  For some reason, blueberry+rhubarb just hits the right balance of sweet and tart and juicy for me in a way that strawberry+rhubarb doesn't.


One last piece of news:  desserts for breakfast finally has its own Facebook page!  It took a lot of nudging and convincing from friends, bloggers and non-bloggers alike, but now it exists, if that's your preferred mode of keeping up with posts and feeds and news.  So 'like' desserts for breakfast on Facebook!  Also, now that we have this little Facebook-based space, I want to open it up to you readers, too.  Have you made a desserts for breakfast recipe before?  Have you photographed it or blogged about it?  If so, shoot me an email (s [at] dessertsforbreakfast [dot] com) and tell me about it, and I'll share it on the new desserts for breakfast Facebook page.  I'm excited to see what you all have done!  :-D


Read on for recipe....

Sunday, May 15, 2011

Behind the shot: 'Oranges'


I hope you don't mind if there's no recipe today.  Truth is, last week was spent mostly out of the kitchen, madly working and then scrambling to pack before my trip out of town (btw, hello from Scotland!).  But, I have been spending a lot of time thinking about the photographic process, between getting ready for my BlogHer Food panel on "Finding your visual voice" (with Tami and Aran) and hearing about the Penny de los Santos live-streamed workshop via twitter that I sadly had to miss due to travel arrangements.  So, I thought today that I'd share another recipe/how-to of sorts: a behind-the-scenes break-down of my oranges shot above (from this kiwi orange creamsicle post).

[1]

This image, the first one I took, was mostly about testing the light, the plate, and the table together with the oranges, as well as adjusting for exposure and aperture settings (shooting manual).  It's sort of atypical for me to use a plate like this one--it's a bit too modern and 'clean-cut' for my tastes--but here, I actually quite liked how it contrasted with the extra rustic quality and texture of the wood underneath.

The lighting set-up here is a large window to the right of the table. I didn't use a reflector on the left because I wanted to have some of that shadowing you see from the oranges, to give them dimension.  Otherwise, I find globular objects sometimes uninteresting and difficult to shoot/style because they come across flat so easily.  Plus, I just like shadows, if you haven't noticed already.  :-)


[2]

Having two whole oranges on a plate just looked boring and awkward, so here I added two slices of oranges as well as a knife, to give the photo a bit of context.  The orange slices also fill in blank space in the bottom left of the plate, while the diagonal knife at the back fills in the negative space up there.  Even so, everything is still angled a little off-center on the plate, just so things don't look too symmetrical and, by extension, staged.

[3]

What I still wasn't satisfied with in photo [2] above was that the bright lighting in the upper right hand corner distracts from the focus on the oranges.  One thing I'm constantly thinking about is where I want to guide the viewer's eye in a photo, and I want to make it as unambiguous as possible where they should focus and look first before taking in the rest of the image.  So here, in photo [3], I used a scrim to block out some of the light shining on the back of the table behind the oranges--sort of like a vignetting effect.

(Note: the first try with the scrim made the back quite dark, which I'm also not so happy with, but I fixed this in later shots.)

[4]

Since I was going for a sort of vignetting effect with the lighting, I wanted to block out some of the light in front of the plate, too, so here's the lighting set-up I ended up with.  I think of this as "narrowing the aperture" of the window to control exactly where the light falls.

[5]

Once the lighting was set up, I could focus on the actual plate. Once again, the two full, uncut, globular oranges were just sort of awkward, especially when accompanied by two orange slices: where did those two slices come from, for instance, if both oranges on the plate were uncut?  Instead, I switched out one of the full oranges for a half, keeping the prettier of the two full oranges in the back.

I angled the half orange towards the light so that the light would fall onto the open face side, which is the interesting part that you want to look at, and create shadows on the underside.  (akin to how you might turn someone's face towards the light in a portrait and create shadows only on certain parts of their face and neck.)

[6]

Looking at photo [5], I still found the foreground and background table to be too distracting to the eye: i.e., there's just too much negative space that detracts from the photo rather than adding any interest.  My original intention was to crop photo [5] in post-processing to a square, since I liked how the square-format shot turned out using Instagram.  (tip: iPhone makes a great shot-previewer, if you will.)


[7]

Another way that I tried to limit the foreground and background excess space was to try a landscape framing rather than a portrait one, which ended up working well because it didn't cramp the plate so tightly as the portrait framing did.  This is the final raw image straight from the camera.
[ISO 200, f/2.8, 1/250 sec]

[8]

Finally, I don't usually do much post processing to my images, but I do like to increase the contrast, which enhances the distinction between the lights and the shadows.

...and there's the final product!